# Wakanda Land

## Purpose
Wakanda Land is a Cyber Range deployment tool that uses ```terraform``` for automating the process of deploying an Adversarial Simulation land infrastructure, for practicing various offensive attacks. This project inherits from other people's work in the Cybersecurity Community and due credit has been provided in the Credit Section. I just added some additional sprinkles to their work from my other researches.
## Demo
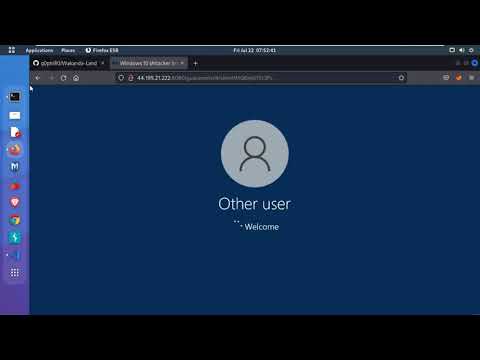
[A short demo video](https://youtu.be/gpCknMZw7vA) which demonstrates deploying the lab, quick test to ensure it functions and how to destroy it once you are done.
## Attack Techniques Covered
- Kerberoasting
- ASRepRoasting
- Constrained Delegation (computer and user)
- Unconstrained Delegation
- Resource Based Constrained Delegation
- Write ACL of user
- Write ACL of computer
- WriteDACL over domain
- Write ACL of group
- DnsAdmin members
- Write ACL of GPO
- Password in AD Attributes
- Cross Domain Trusts (for Trust Abuse)
- SMBSigning disabled on all machines for relay attacks
- Windows Defender uninstalled
- Others such as Pass-the-Hash, Pass-the-Ticket, Golden Tickets, Silver Tickets, etc.
- Web application exploitation techniques (covering OWASP Top 10)
## Architecture
The deployment of Wakanda Land environment consist of:
- Two Subnets
- Guacamole Server
- *This provides dashboard access to Kali GUI and Windows RDP instances*
- *This runs two variations of dashboards (one is vanilla Apache Guacamole and the second one is a customized Apache Guacamole)*
- *The Kali GUI, Windows RDP and the user accounts used to log into the instance in the Apache Guacamole are already backed into the deployment process*
- Windows Domain Controller for the Child Domain
- Windows Domain Controller for the Parent Domain
- Windows Server in the Child Domain
- Windows 10 Pro in the Child Domain - Customized AMI image for this one
- Kali Machine - a directory called ```toolz``` is created on this box where Impacket and Covenant C2 are downloaded into that folder, so its just a matter of running Covenant once you are authenticated into Kali
- Debian Server serving as Web Server 1 - OWASP's Juice Shop running on this one
- Debian Server serving as Web Server 2 - Several vulnerable applications running on this one
## Installation and Setup
```
Terraform
Visit https://www.terraform.io/downloads and follow the installation process for your OS
AWS
Log into your AWS dashboard and create an EC2 Key Pair
Download a copy of the Private Key unto your development system
Create a Public Key from your Private (e.g. from a commandline, you can use a command like this: ```ssh-keygen -y -f /terraform-key.pem```)
Installation: Visit https://aws.amazon.com/cli/ and follow the installation process for your OS
Configuration: Visit https://docs.aws.amazon.com/cli/latest/userguide/cli-configure-quickstart.html and follow the instruction on setting up your AWS CLI environment
e.g aws configure
AWS Access Key ID [None]: AKIAIOSFODNN7EXAMPLE
AWS Secret Access Key [None]: wJalrXUtnFEMI/K7MDENG/bPxRfiCYEXAMPLEKEY
Default region name [None]: us-west-2
Default output format [None]: json
DSC
1. First, install the following from the PowerShell terminal (Assuming doing this on Windows box)
- Install-module -name GroupPolicyDsc
- Install-module -name activedirectorydsc
- Install-module -name networkingdsc
- Install-module -name ComputerManagementDsc
2. Update the PowerShell script (jungle.ps1) with the following:
- Import-DscResource -ModuleName ActiveDirectoryDsc
- Import-DscResource -ModuleName NetworkingDsc
- Import-DscResource -ModuleName ComputerManagementDSC
- Import-DscResource -ModuleName PSDesiredStateConfiguration
3. Run the script (```. .\jungle.ps1```) from within the ```dsc``` directory to create the MOF files, which will be dumped into the ```Jungle``` folder
S3
Create an S3 bucket for your account and modify the variable in terraform/vars.tf with your bucket name
Management IP
Change the management IP variable in vars.tf to be your public IP address
SSH Keys
Store the SSH Public Key file within ./terraform/keys/terraform-key.pub
Update the file in the vars.tf to point to that public key (which will assign it to the created EC2 instances)
Can use this key pair to get the administrator default password from AWS
Once you run the terraform, it will take some time to provision everything, so give it about 45 mins to an hour and you should be good to go.
```
## Running the land
You can take the following steps in running the land (must be ran from the terraform subfolder):
### Initialize terraform
```
terraform init
```
### Validate your script is properly setup
```
terraform validate
```
### Plan for final sanity checks
```
terraform plan
```
### Deploy the land
```
terraform apply --auto-approve
```
### Verify with AWS that the assets have been created
```
aws ec2 describe-instances --query 'Reservations[].Instances[].[Tags[?Key==`Name`].Value,InstanceType,PublicIpAddress,PrivateIpAddress]' --output json
```
### Connect to the land
```
- SSH into the Guacamole server (g.e. ssh -i terraformkey.pem admin@guac-server-ip)
- Change directory into the guacamole directory on the server (cd guacamole)
- Display the .env content (cat .env)
- Copy the GUACADMIN_PASSWORD password
- Log into the Guacomole dashboard with the username guacadmin and password copied
```
### Running a test
```
- Open the Kali instance from the Guacamole dashboard
- On Kali, open up a terminal and change directory int /toolz/Covenant/Covenant (cd toolz/Covenant/Covenant)
- Start the Covenant C2 server (sudo dotnet run)
- Navigate to https://127.0.0.1:7443 in a browser (ensure the browser is the one in Kali)
- Create a new Covenant user account and log in
- Once on Covenant C2, create a Listener and ensure the BindAddress and ConnectionAddress are set to the Kali's internal IP address
- Create a PowerShell launcher
- Open a new terminal window (or tab) in Kali and change directory into /toolz/impacket/examples (cd /toolz/impacket/examples)
- Use Impacket's WMIEXEC script to obtain a shell on a victim's machine, simulating an initial foothold within the Active Directory environment (python3 wmiexec.py first/wakandan:Password\@1@10.0.1.50)
- Copy the PowerShell launcher from Covenant and paste it in the shell obtained on the victim's machine (e.g. 10.0.1.50)
- Confirm you have a connection (Grunt) back to your Covenant C2 framework
- You can continue with other attack techniques via Covenant
```
### Destroy the land
```
terraform destroy --auto-approve
```
### Creat new workspace
```
terraform workspace new example
```
## List workspace
```
terraform workspace list
```
## Credits
```
- XPN: https://github.com/xpn/Demolab
- MDSec: https://www.mdsec.co.uk/2020/04/designing-the-adversary-simulation-lab/
- Phil Keeble: https://github.com/PhilKeeble/AWS-RedTeam-ADlab
- Splunk: https://github.com/splunk/attack_range
- oehrlis: https://github.com/oehrlis/guacamole
- https://github.com/splunk/attack_range/wiki/Upload-Windows-10-AMI-to-AWS
- https://www.rickgouin.com/run-a-windows-10-instance-in-aws-ec2/
- https://www.infracost.io/docs/#1-install-infracost
- https://github.com/mandiant/commando-vm/blob/master/packages.csv
- https://github.com/paidem/guacozy
- https://www.terraform.io/cli
- https://owasp.org/www-project-juice-shop/
- https://github.com/vulhub/vulhub.git
```